

Post by eniisa on Dec 18, 2005 22:56:53 GMT -5
Ever wondered how to do those shapes that cut into each other and repeat all over the page? Now with the help of this tutorial you can make one! Ask/reply to this thread if anything is unclear or anything because I'm kind of bad at explaining xD
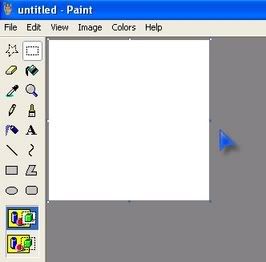
1. Ohkay here we go.. open Paint and make a new Paint image.. I've made mine about 200 pixels by 200 pixels:
2. Then draw a box with the line tools and erase fuzzy corners with the eraser tool:

Oh and to make the lines straight, press SHIFT on your keyboard while drawing the lines, its easier.
3. Then you should have a box.. then fill the box with the paint bucket..
4. Now you should have something like this:
Take the 'Free Form Select' tool and cut a shape on the top part of the shape:
Like that except you have to 'close' the shape (I wasnt able to show that in this tutorial because it wouldn't let me.)
5. Now you should have something like this:
Take your mouse and move it to the bottom of the shape:
Erase pixels left at the top and of there are white spaces fill them in too.
6. Do the same to the left and drag the piece to the right side.
7. Now you should have something that generally looks like this:
8. Save it and close Paint. Open Photoshop, or PSP, whichever you're using, this should work for both programs. I will be using Adobe Photoshop CS2
9. Use the magic wand tool to select the object, or alternatively you can use magnetic lasso tool
  to do it as well, either way, the object will turn out like this:
10. Now you have that, copy and paste the shape, then fill it in with another color. Drag it to 'fit in' with the original shape that you have created so it fits. Keep doing this to create a whole background!
This is my result:

The quality of the picture isn't that good so yours should be better than mine! Have fun! and go nuts with it!
-Eniisa
1. Ohkay here we go.. open Paint and make a new Paint image.. I've made mine about 200 pixels by 200 pixels:
2. Then draw a box with the line tools and erase fuzzy corners with the eraser tool:
Oh and to make the lines straight, press SHIFT on your keyboard while drawing the lines, its easier.
3. Then you should have a box.. then fill the box with the paint bucket..
4. Now you should have something like this:
Take the 'Free Form Select' tool and cut a shape on the top part of the shape:
Like that except you have to 'close' the shape (I wasnt able to show that in this tutorial because it wouldn't let me.)
5. Now you should have something like this:
Take your mouse and move it to the bottom of the shape:
Erase pixels left at the top and of there are white spaces fill them in too.
6. Do the same to the left and drag the piece to the right side.
7. Now you should have something that generally looks like this:
8. Save it and close Paint. Open Photoshop, or PSP, whichever you're using, this should work for both programs. I will be using Adobe Photoshop CS2
9. Use the magic wand tool
to select the object, or alternatively you can use magnetic lasso tool to do it as well, either way, the object will turn out like this:10. Now you have that, copy and paste the shape, then fill it in with another color. Drag it to 'fit in' with the original shape that you have created so it fits. Keep doing this to create a whole background!
This is my result:
The quality of the picture isn't that good so yours should be better than mine!
Have fun! and go nuts with it!-Eniisa


 Thank you!
